


Homemade Honey Cruller Donuts: A Step-by-Step Guide to Irresistible Delicacies
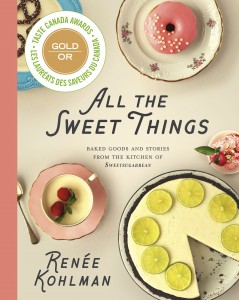
Having spent numerous evenings in a quaint doughnut shop during her youth, Renée Kohlman was adamant about including the Honey Cruller Donuts recipe in her cookbook. These are quite possibly the most elegant donuts, far surpassing the taste of those available at a local drive-through. Just a friendly heads-up. Crafting these crullers involves a deep fryer and preparing choux paste, but rest assured, they are more manageable than they appear. If the shapes turn out slightly irregular, fear not— that’s where the glaze comes into play. It’s akin to the under-eye concealer of the dessert realm. Once the crullers have achieved a puffed, golden perfection, allow them to drain briefly before immersing them in the luscious honey glaze. Feel free to double-dunk, or even triple-dunk if you’re so inclined. The initial bite of a homemade cruller is an experience to remember. You might need to take a seat. Consider yourself forewarned.
INGREDIENTS
French Crullers
1/2 cup whole milk
1/2 cup water
1/4 cup + 2 Tbsp unsalted butter, softened
2 Tbsp icing sugar
1/4 tsp salt
1/4 tsp ground nutmeg
1 cup all-purpose flour
4–5 large eggs, at room temperature 8 cups
canola or vegetable oil, for frying
Honey Glaze
1-1/2 cups icing sugar
3 Tbsp whole milk
2 Tbsp liquid honey
2 tsp fresh lemon juice
RECIPE
- Cut fifteen 3×3-inch squares out of parchment paper and place them on a baking sheet. Lightly spray each square with cooking spray, or use a pastry brush to grease them with a little oil.
- To make the crullers, combine the milk, water, butter, sugar, salt and nutmeg in a medium saucepan and bring it to a simmer over medium heat, stirring once or twice. Once the butter melts and the mixture is bubbling, turn down the heat to low and add the flour all at once. Stir immediately with a wooden spoon or heatproof spatula. Keep stirring over low heat until the mixture is thick and pulls away from the sides of the saucepan, about 5 minutes. This allows the moisture to evaporate and allows more fat to be absorbed when the eggs are added. When the dough steams a little and
smells kinda nutty, you know you’re doing great! - Immediately transfer the dough to the bowl of stand mixer fitted with a paddle attachment. Beat on medium speed for about 1 minute to cool the dough. Add 4 eggs, one at a time and beating each one until it’s thoroughly incorporated. Be sure to stop the mixer and scrape down the bowl after each addition. After you’ve beaten in the last egg, the mixture should be glossy and thick, but still pourable. When scooped into a spoon, the dough should slowly pour off the spoon. If it doesn’t fall off, or it comes off in one big lump, beat in the fifth egg.
- Scoop the dough into a large piping bag fitted with a large star tip. Pipe a ring onto each square, approximately 3/4 inch high. If your rings seem too skinny, pipe a bit more on top. Place the baking sheet full of piped rings in the freezer for 30 minutes. This will help the crullers keep their beloved ridges.
- Heat the oil to 370°F in a large, deep saucepan. Line a baking sheet with paper towels and set a wire rack over it.
- Place 2 or 3 crullers, still on their parchment paper, in the hot oil, paper side up. You need to use your hands to do this, so just make sure you don’t burn your fingertips. The paper will release when it’s ready and will float off. Use tongs to lift the paper out and to flip the crullers over occasionally, so they brown evenly. Fry them for about 3 minutes, until golden brown. Set the crullers on the wire rack while you fry the remainder.
- To make the glaze, sift the icing sugar into a medium bowl, then whisk in the remaining ingredients. Dip the tops of the crullers into the glaze while they’re still warm. Place them back on the wire rack until the glaze sets.
- Crullers are best eaten the day they are made, but can be stored in an airtight container at room temperature for 1 day.
NOTE: Let the oil cool down completely before disposing of it in glass jars. Or you can save it for your next deep-frying adventure! Once the oil has cooled down completely, I pour it into a large plastic or glass container with a tight-fitting lid and use it up within a month.
Recipe by Renée Kohlman from All the Sweet Things, copyright © 2017 by Renée Kohlman.